In Microsoft SharePoint Server 2010 you can manage records in an archive, or you can use in-place records management, managing records in the same document repository as active documents. By using in-place records management, when you declare that a document is a record, it remains in the same location, but SharePoint Server 2010 now manages it as a record.
You can use records management features on any document and on any site. The ability to manage records on any site gives record managers more control over how business and legal records with a long term value are handled. Managing records “in place” also enables these records to be part of a collaborative workspace, living alongside other documents you are working on.
There are four minimum steps to configure In Place Records Management
- Activate the In Place Records Management Feature
- Setting Records Declarations
- Document Library Settings
- Declare a Record
Step 1: Activate the In Place Records Management Feature
At the top site collection level, go to Site Actions > Site Settings > Site Collection Features and Activate the In Place Records Management feature.

Step 2: Setting Records Declarations
Next, set the standard records declaration for the site collection. Remember that these settings can be adjusted at each document library.
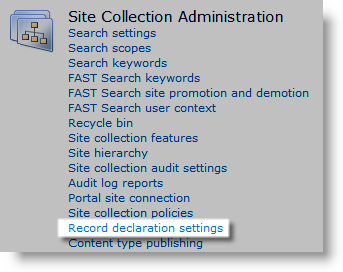
At the same Site Collection settings page, click on under Site Collection Administration > Record declaration settings
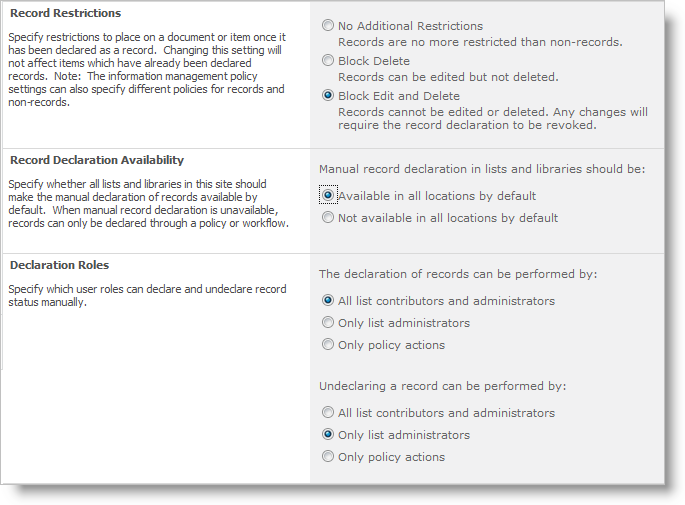
You can now set the edit and delete restriction when a document is declared as a record. You can also allow manual record declaration by selecting the “Available in all locations by default” radio button. If this button is not checked, then the only way to declare a record is via workflow and/or by using your information policy. You can also define which security roles can declare a record.
Step 3: Document Library Settings
Next, you can override some records settings at the document library level. Click on the Document Library, and select Library Tools > Library > Library Settings.
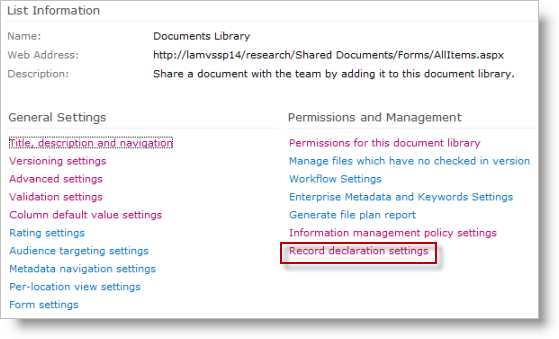
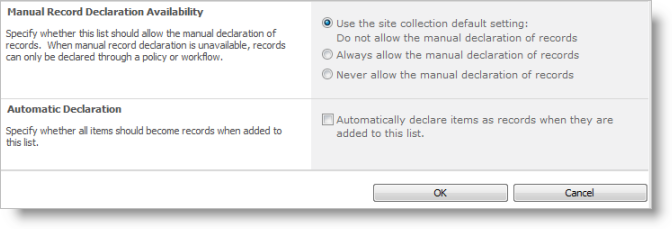
Click on the Record declaration settings link, and you will see the options to either use the settings that were set at the site collection level, or to allow record declaration at the document library level.
Step 4: Declare a Record
Go to your document library, select Library Tools > Document and select a document or Document Set. Click on Declare Record in the Ribbon. Note that this icon is visible since we opted to be able to manually declare a record anywhere in our site collection. You will not see this icon if you opted for automatic declaration.
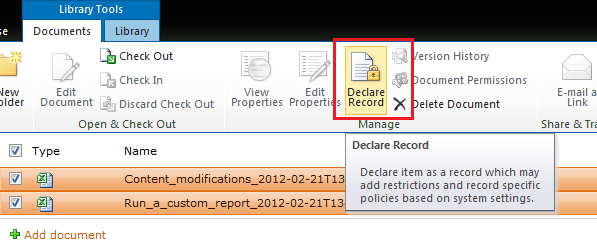
Note: In the example above, you can conveniently select the entire Document Set to declare it as a record. Once you have declared a document as a record, there will be a padlock symbol on the icons.

How to Undeclare a record
There is no icon to undeclare a record in the Ribbon. In order to undeclare a record, go to the item and select Compliance Details on the drop down menu.
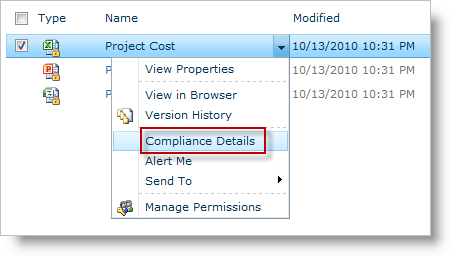
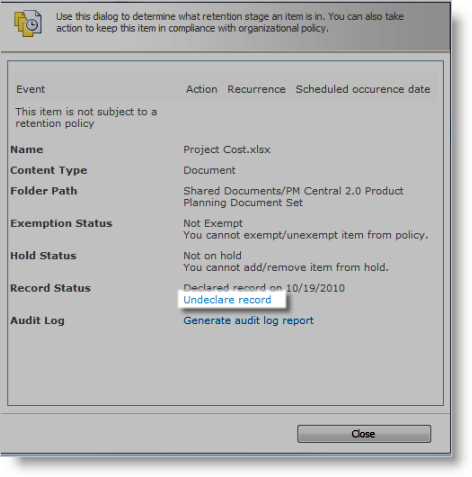
From the pop up form, select Undeclare record. Note that you will need the correct permissions in order to undeclare a record, which were set in the Site Collection settings page. In some situations, when this menu is disabled, make sure that your document library is not set to automatic declaration mode.
In Place Record Management Finished. I hope this is helpful for you.

Wow! This blog looks exactly like my old one! It’s on a totally different topic but it has pretty much the same layout and design. Outstanding choice of colors!